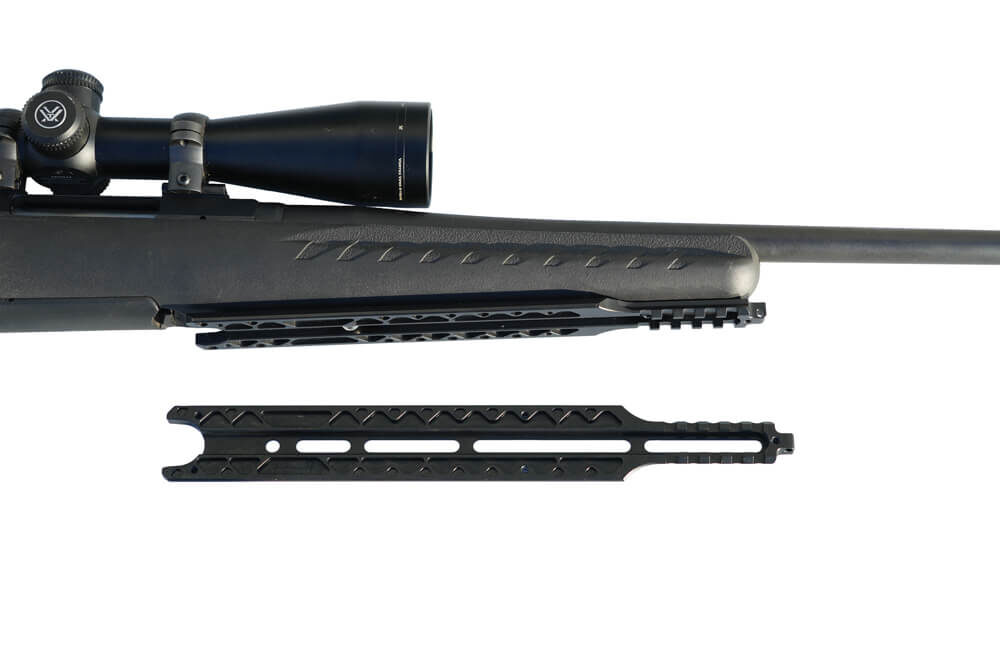
If you’re ready to upgrade your Ruger American 7mm-08 or other similar rifle with an SRS Hunters Rail, this guide will walk you through each step. Installing the SRS Hunters Rail can transform your rifle from a “lay-on-something” setup into a rock-solid mount for bipods or tripods. My approach is straightforward, but feel free to adjust any steps or swap out tools based on what works best for you.

Tools & Parts Needed:
- Hunters Rail
- Screws and washers: 10/32” – 3/4” x3
- Drill bits: 3/4” spade bit, 1/4” bit, 3/32” bit
- Paper towels
- Epoxy: JB Weld Plastic adhesive epoxy
- Mixing stick for epoxy
- Medium-hold Blue Loctite
- Sanding stone Dremel bit
- Drill
- Allen wrench set
- Star wrench set
Step 1: Disassemble the Rifle

Start by removing the stock from your rifle, and give the inside a good clean to clear out any oil or debris. This will give you a clean surface to work with.
Step 2: Determine the Hole Location

The Ruger stock has a skeleton frame running along its length, reinforced by cross supports. Since the bottom of the stock isn’t thick enough for the SRS lock nut, aim to place the mounting holes on a skeleton frame crosspoint. Two mounting points are usually enough, but add a third if you want extra stability.
Step 3: Rough Up the Surface

Using a sanding stone or Dremel bit, rough up the stock’s interior where the epoxy will go. This helps the epoxy bond more securely to the surface.
Step 4: Prep Stock for Epoxy

After sanding, clean out any debris or shavings. Mix a two-part epoxy that sets in five minutes and cures in an hour. Spread the epoxy across each mounting spot up to the top of your planned drill location.
Step 5: Let the Epoxy Cure

Even though the epoxy will feel tacky after an hour, it usually needs closer to three hours to set fully. Once cured, you’re ready to drill the mounting holes.
Step 6: Drill the Mounting Location

Using a 3/32” drill bit, drill through the epoxy and the bottom of the stock, making sure to keep your drill level. If you have access to a drill press, it’ll make this step easier.
Step 7: Drill with the Spade Bit

From the epoxy side, drill down with a 3/4” spade bit to create room for the SRS locking nut. Use light pressure, and avoid going too deep. The epoxy gives you a solid surface to support the locking nut.
Step 8: Enlarge the Hole

Switch to a 1/4” bit and drill from the bottom of the stock. This widens the hole so the locking nut can sit within the 3/4” drilled space, allowing the mounting screw to pass through.
Step 9: Place the SRS Locking Nut

Insert the locking nuts from the top side of the stock, pressing them in until they sit flush.
Step 10: Apply Loctite

For the mounting screws, use a medium-strength Blue Loctite. In this install, a single SRS mounting screw along with a 10/32” x 3/4” screw provided a secure fit, but you may adjust based on your particular setup.
Step 11: Mount the Hunters Rail

Position the rail on the rifle and tighten the screws evenly. If you have a torque wrench, use it for precise tightening.
Conclusion

The SRS Hunters Rail adds a whole new level of versatility to your rifle, enabling you to use bipods or tripods for improved stability. The installation process takes a few hours mainly due to epoxy curing time, but the results are well worth it. This method can work for other SRS rails, too. If your stock has sling strap slots, consider using them to streamline the process.

Have questions? Don’t hesitate to reach out by email or phone.


